This guide gives you a step by step guide on how to set up a deduction for a customer on the Remita platform.
Note: To use this deduction, the organisation administrator must have configured Remita Salary as part of the integrations to be used for the product during product setup.
Step 1: Click on the loan you want to set up on
Step 2: Click on the integration tab (Fourth tab)
Step 3: Click on "Deduction" under the integrations on this loan section
Step 4: Ensure Remita Salary is selected from the available deduction options
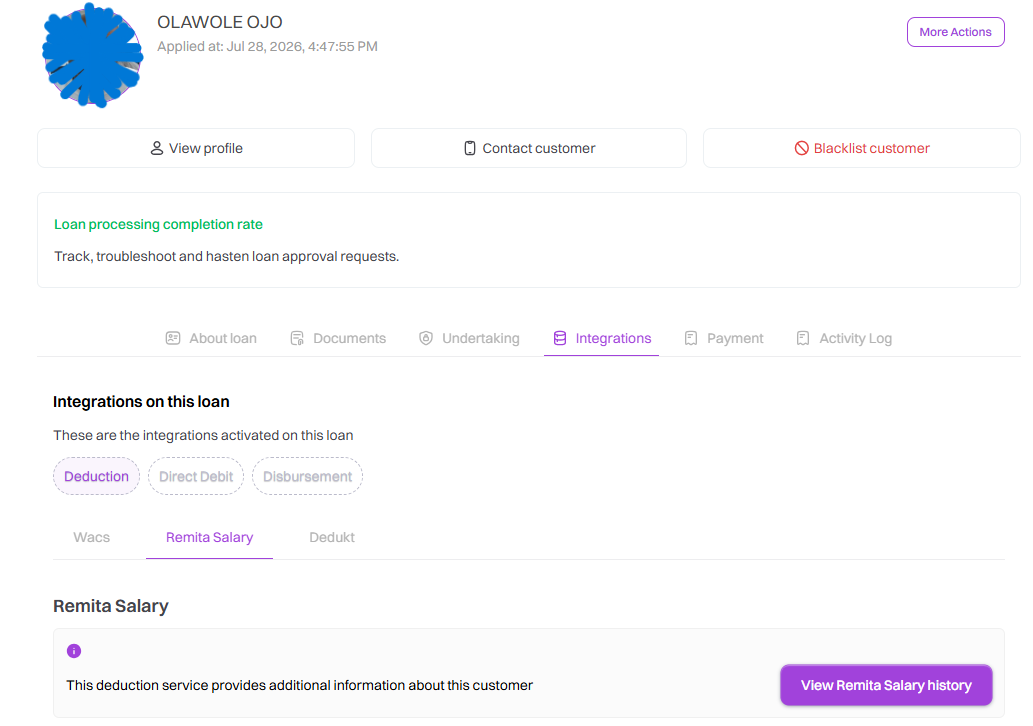
Step 5: Click on View Remita Salary History to fetch customer's Remita history. A modal pops up where you can see customer's details with Loan history details and Salary payment details . Then click on Set up Deductions .
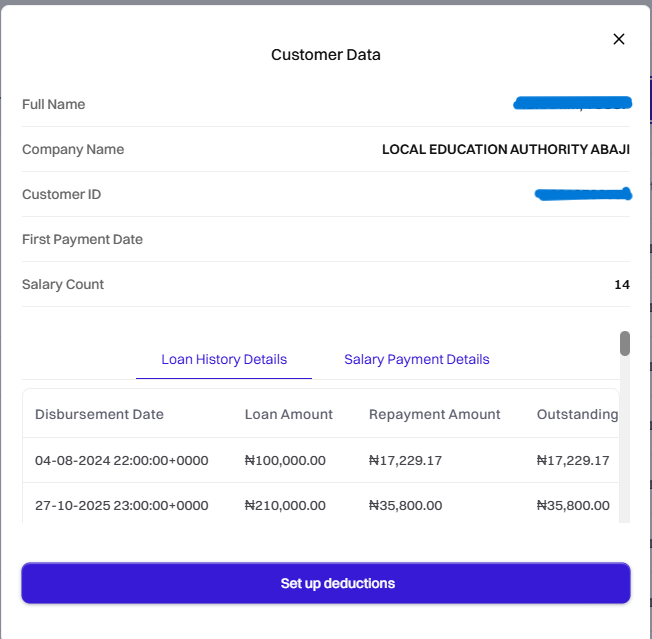
Step 6: Go through all the fields to confirm the details are correct. If correct, click on "setup deductions".
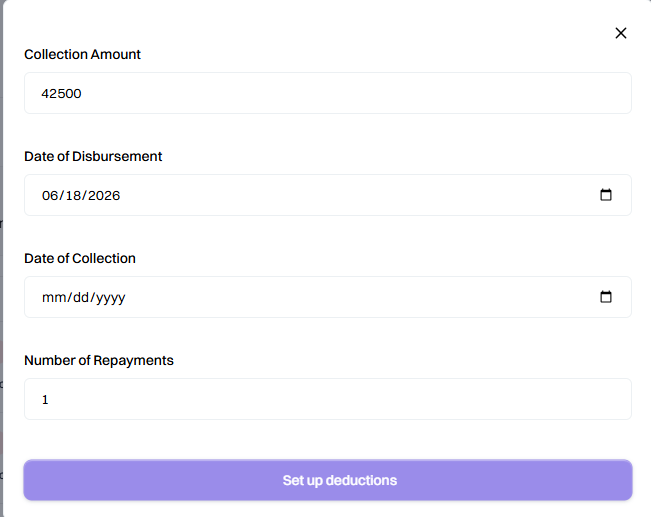
Step 7: A successful deduction set up shows as seen in the image below with a default new status. It lists all the setup for the loan.

If a setup is not successful, the status returns as failed.

Step 7: To view the details of a successful setup,click on the three dots to the right and click "View Mandate history" on the setup
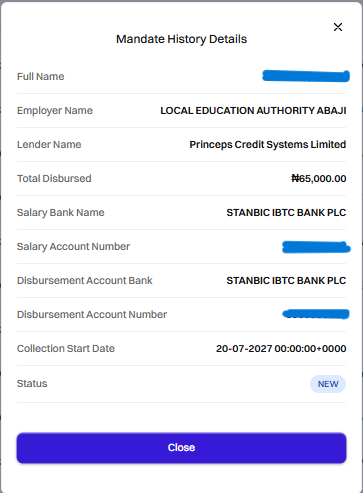
Step 8:
To stop a created setup, click on the three dots to the righthand click on "stop". The status should change to "stop".
